How Do I Connect a Campaign to a DSP and Set Up Monthly Report Emails?
How Do I Connect a Campaign to a DSP and Set Up Monthly Report Emails?
Follow these steps to connect your campaign to a DSP (Demand Side Platform) and set up automated monthly email reports:
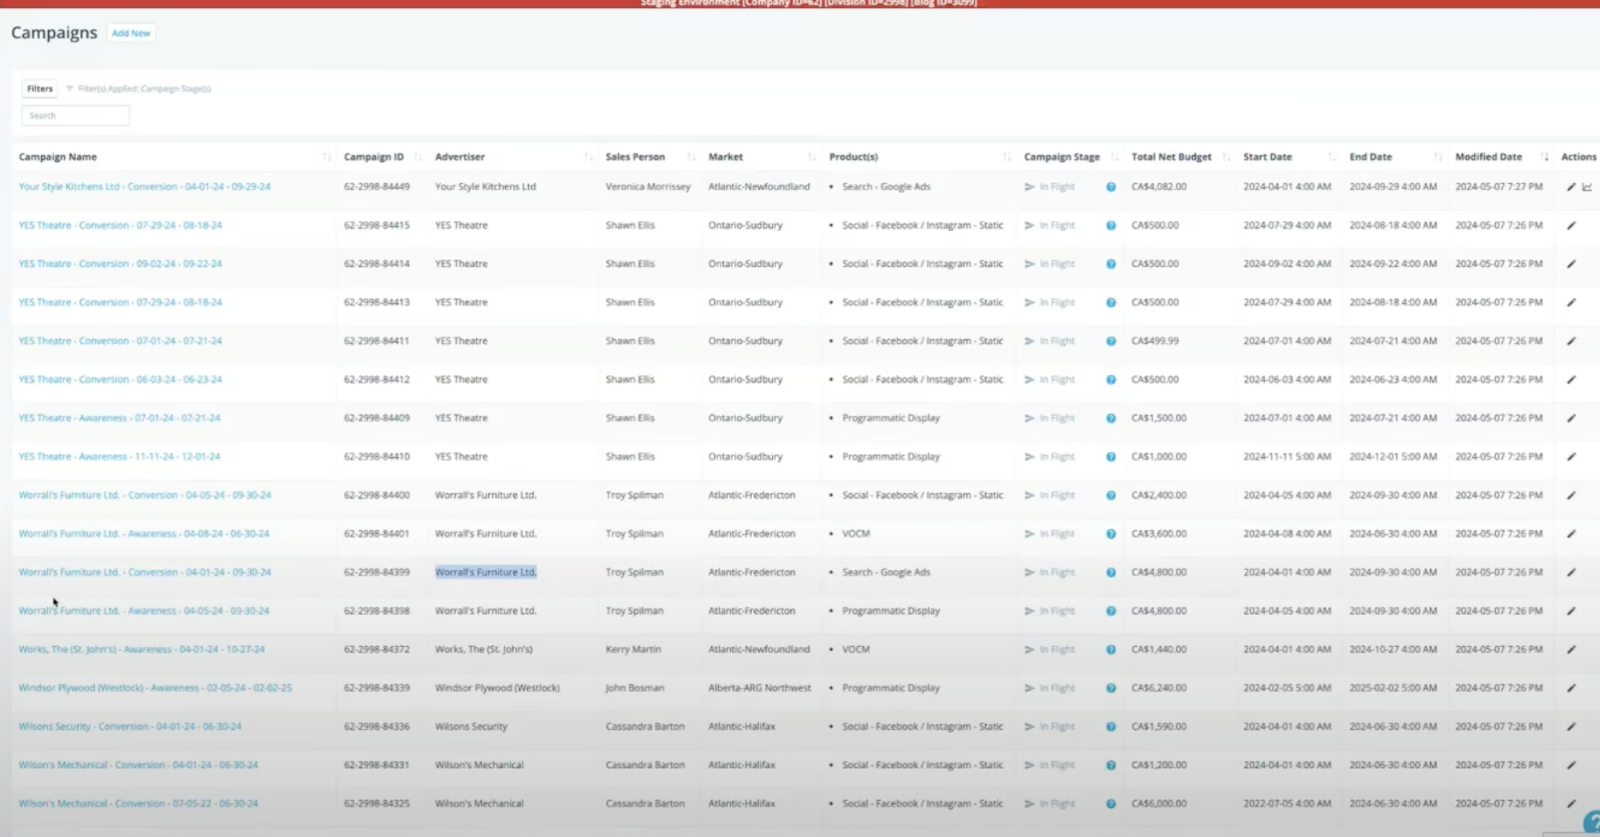
1. Navigate to the Campaigns Dashboard
After importing all campaigns, go to the Campaigns Dashboard. Here, you'll see a list of all your campaigns.
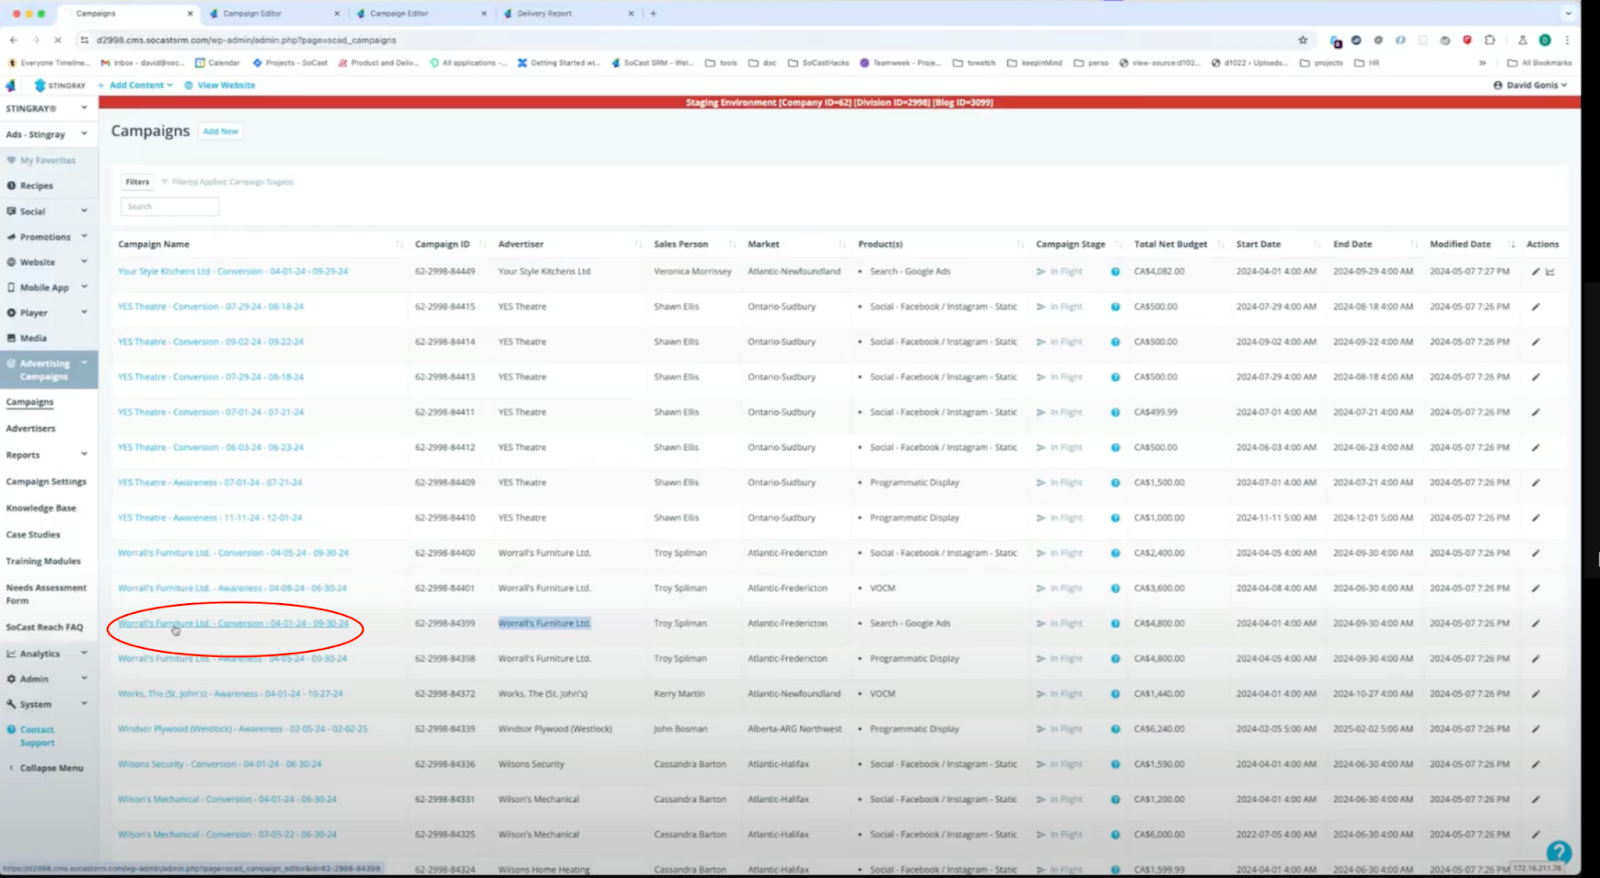
2. Select the Desired Campaign
Click on the specific campaign you want to connect to a DSP and set up monthly reports for.
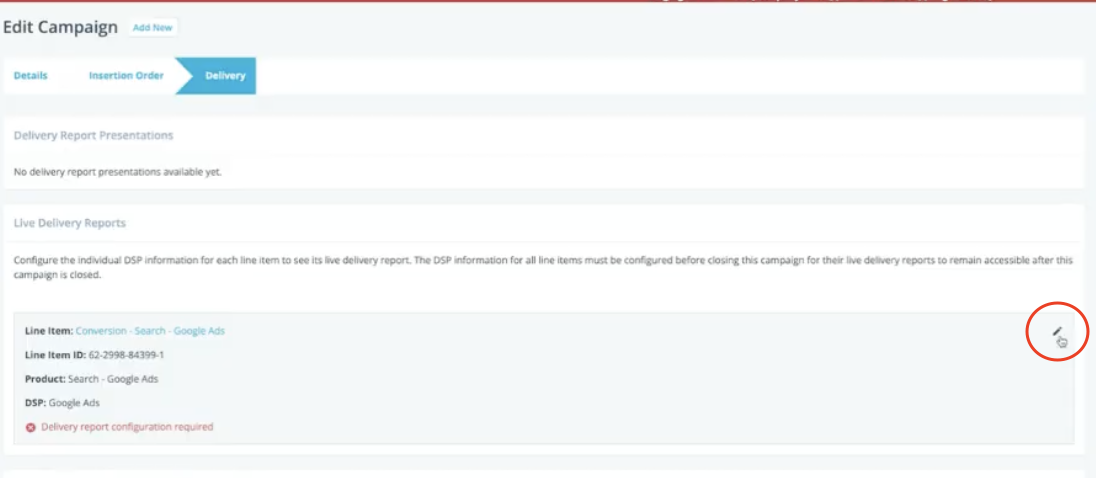
3. Access Campaign Details
- After selecting your campaign, you'll be taken to its detailed view.
- Click the Edit button (pencil icon) to begin connecting the campaign to the DSP.
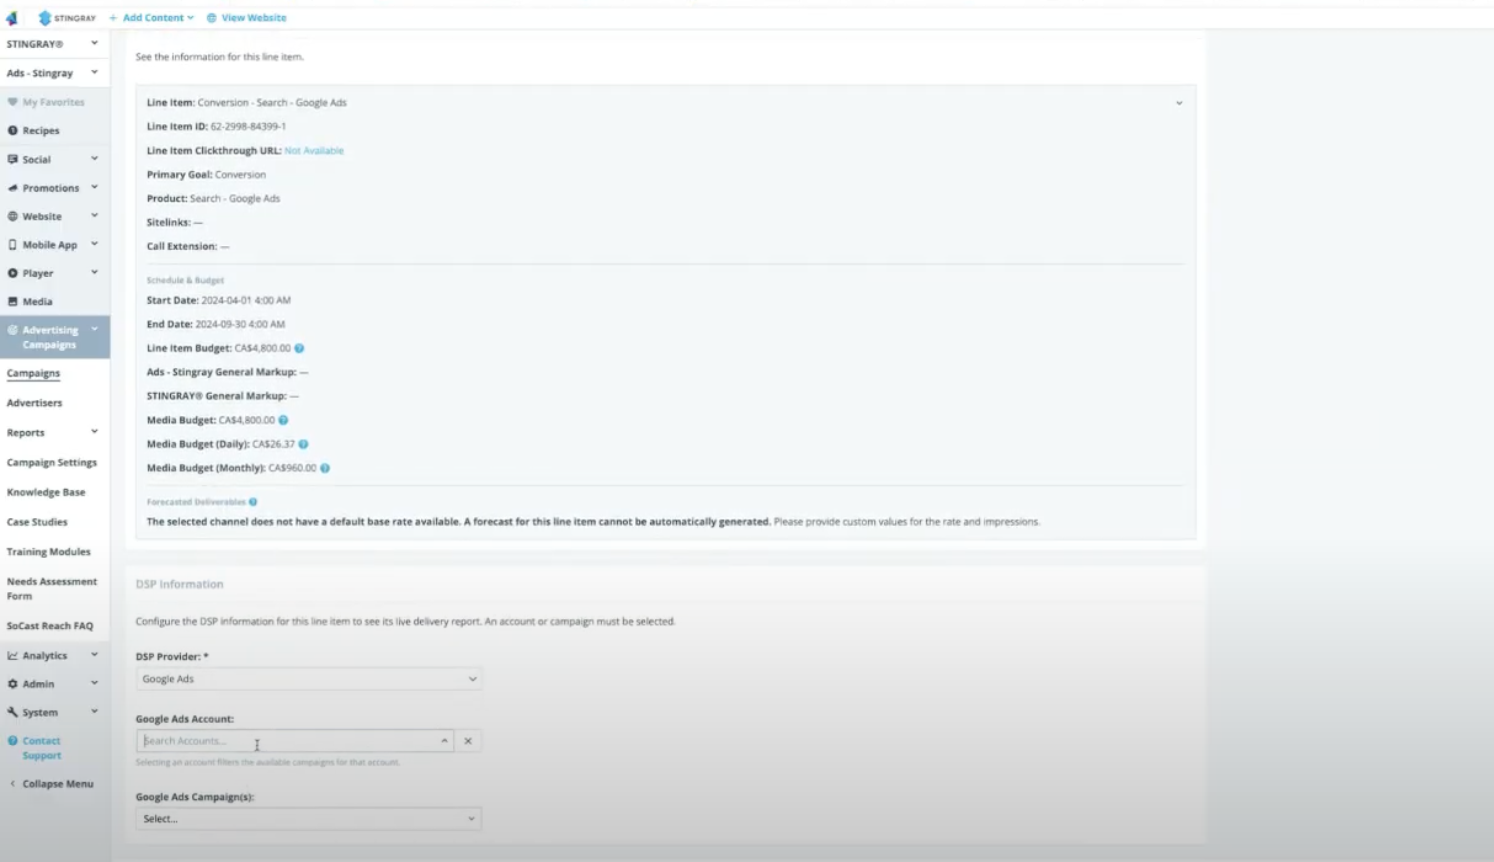
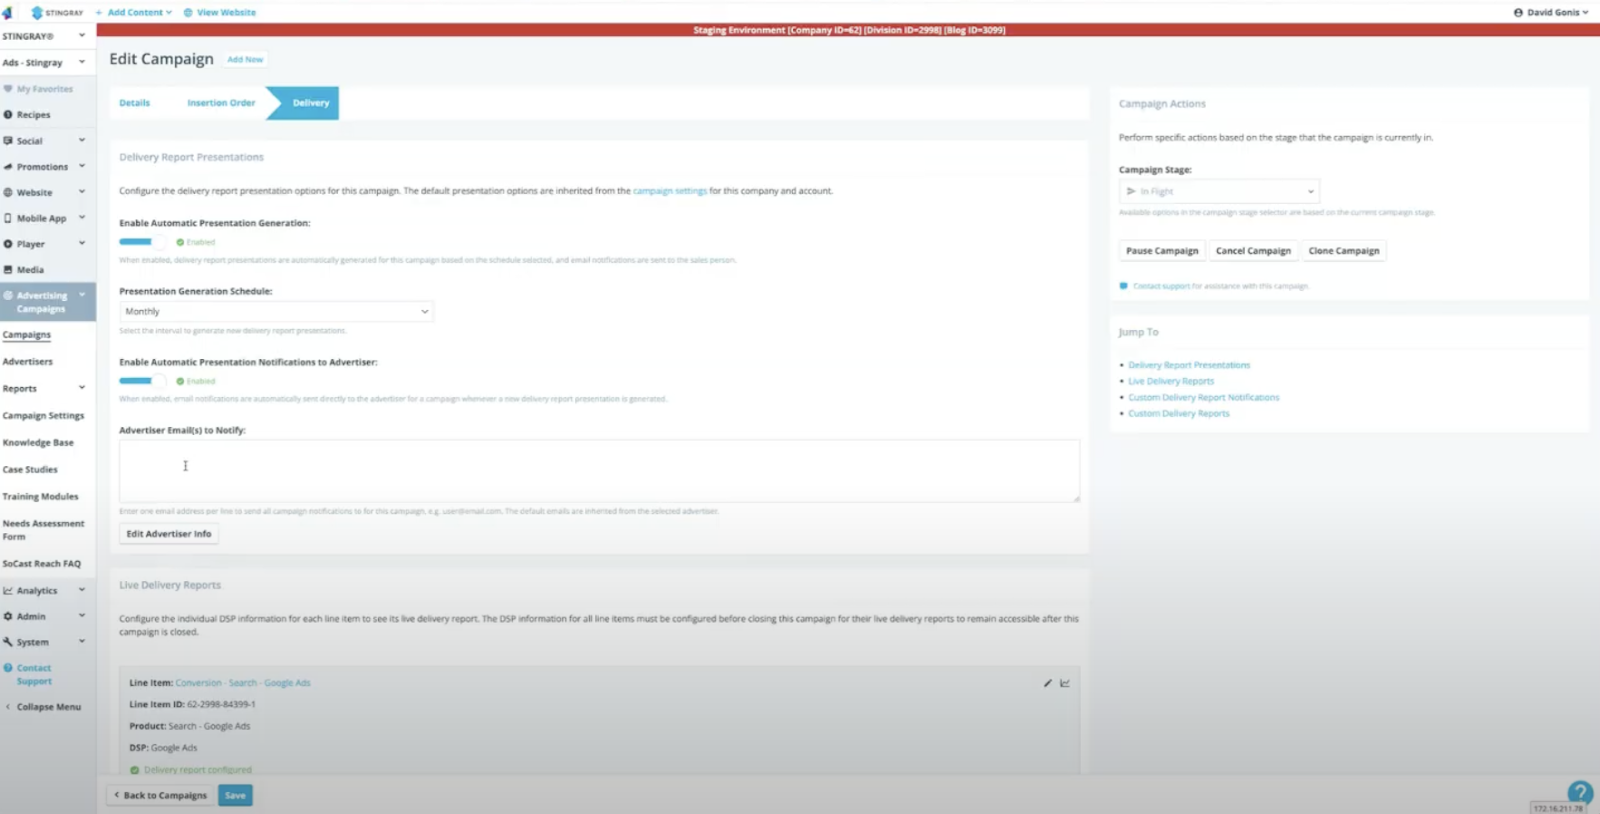
4. Connect to the DSP
- On the next screen, scroll to the DSP Information section.
- Select the appropriate account and campaign from the dropdown menus.
- Note: This step is similar to the process for pulling reports.
5. Save and Return to Campaign
- After entering the DSP information, click Save.
- Click Back to Campaign to return to the campaign overview.
6. Customize Emailed Reports (If Applicable)
- If you want to edit the recipients or frequency of emailed reports, click Edit Presentation Options.
- Make your changes and click Save when finished.
Note: Representatives associated with these campaigns will receive an email titled Delivery Report Presentation - <Advertiser Name> containing the following content:
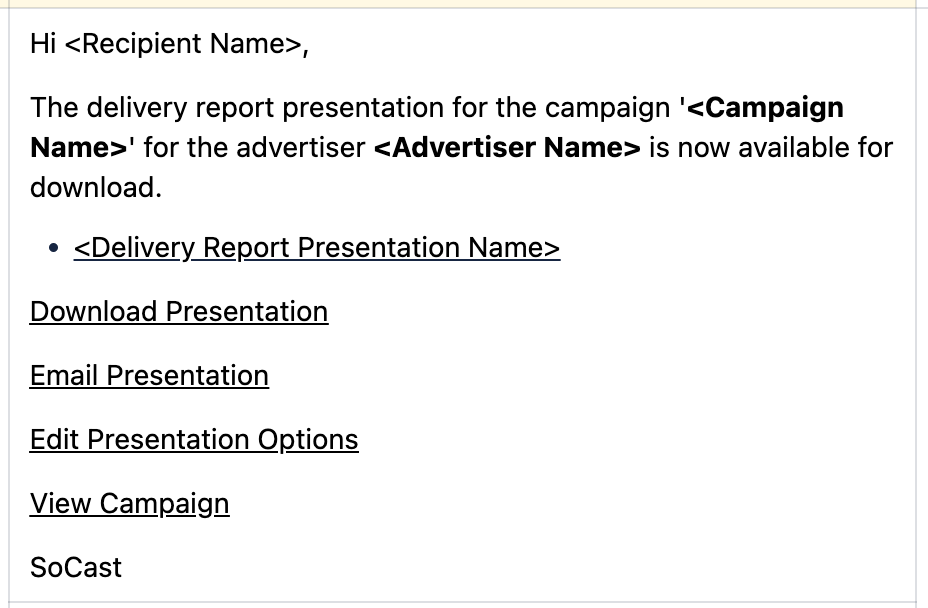
By following these steps, you can easily connect your campaign to a DSP and ensure that monthly reports are automatically sent to the appropriate recipients.
Related Articles
How Do I Share Campaign Delivery Reports in SoCast Reach?
How Do I Share Campaign Delivery Reports in SoCast Reach? SoCast Reach provides two main ways to share campaign delivery reports with your advertisers. Setting up email notifications and sharing these reports helps maintain transparency and keeps ...What Is the SoCast Reach Digital Marketing Handbook/ SoCast Reach Introduction Presentation?
What Is the SoCast Reach Digital Marketing Handbook/Intro Presentation? The SoCast Reach Digital Marketing Handbook is your comprehensive introductory guide to the latest products, features, and processes for SoCast Reach. This resource is updated to ...How Do I Mark a Campaign as Sold and Approve the Insertion Order in SoCast Reach?
How Do I Mark a Campaign as Sold and Approve the Insertion Order in SoCast Reach? Follow these steps to mark a campaign as sold and approve the insertion order in SoCast Reach. Log in to SoCast Reach. Navigate to your campaign dashboard. Select the ...How Do I Assign Campaign Managers to Channels in SoCast Reach Sales Management?
How Do I Assign Campaign Managers to Channels in SoCast Reach Sales Management? This process is typically managed by the Sales Manager. As a Sales Manager, you can assign specific Campaign Managers to individual channels or products within SoCast ...How Do I Use the SoCast Reach Dashboard, Proposal Builder, and Reporting?
Overview Yes! Here is a useful video for you. Our Digital Sales Enablement Specialist will introduce you to the essentials of the SoCast Reach Dashboard and Omnichannel Proposal Builder. Familiarize yourself with the digital process: the SoCast Reach ...