How Do I Upload, Schedule, and Report on Ads in AdNext Using the SoCast Engage Platform?
How Do I Upload, Schedule, and Report on Ads in AdNext Using the SoCast Engage Platform?
Who Is This Article For?
- All users who previously had an AdNext account through our AMP platform.
- This applies to all SoCast themes.
Requirements
- You must have admin access to AdNext.
Accessing Your Station in AdNext
To begin, locate your station’s AdNext link:
- Go to Client Admin.
- Click the letter that matches your station’s call letters (e.g., for WXYZ, click “W”).
- Find your station in the list and right-click on AdNext to copy the individual station link.

Update the link from:
http://adserv.tritonmedia.com/index.php?mkt=FstOqOAdXk4yRxqie
To:
https://adnext.socastcms.com/index.php?mkt=FstOqOAdXk4yRxqie
This will take you to the station’s AdNext login page. Use your main login credentials to access the control panel.
Main Features in AdNext
- Upload/Edit Ads
- Schedule Ads
- Reports
- Schedule New Ad

How to Upload an Ad in AdNext
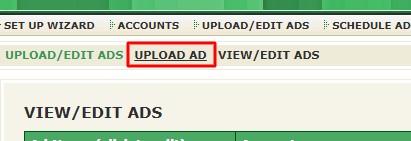
- Navigate to Upload/Edit Ads: Click Upload/Edit Ads in the AdNext platform.
- Access the Upload Ad Page: Click Upload Ad to open the upload form.
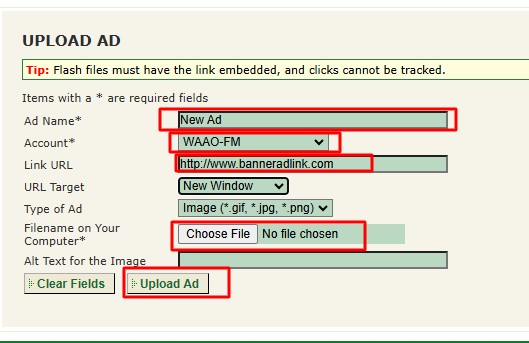
- Fill Out the Upload Ad Form:
- Ad Name: Enter the name of the ad.
- Account: Select the appropriate account from the dropdown.
- Link URL: Enter the destination URL for the ad.
- URL Target: Choose how the URL will open (e.g., New Window).
- Type of Ad: Select the ad type (e.g., Image: .gif, .jpg, .png).
- Filename: Click Choose File to upload your ad image.
- Alt Text: (Optional) Enter alternative text for the image.
- Submit the Form: Click Upload Ad to upload your ad.
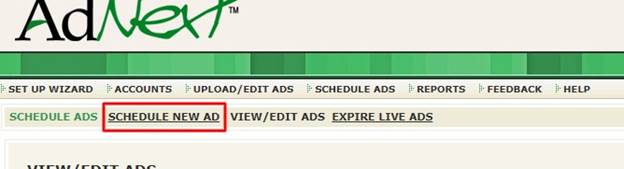
How to Schedule an Ad
- Click Schedule New Ad.
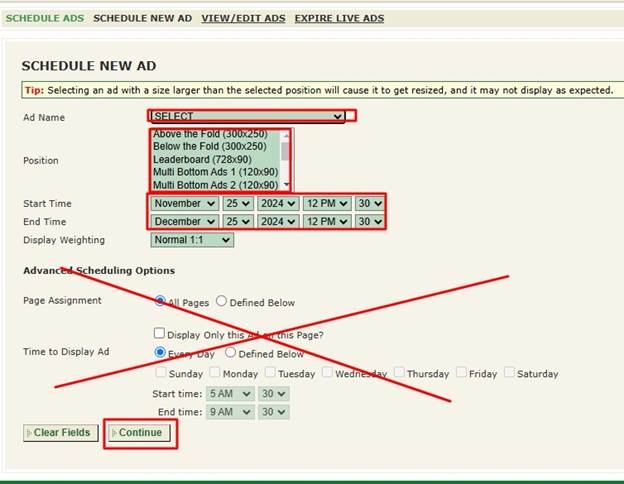
- Select the ad you just created from the Ad Name dropdown.
- Choose the position where you want the ad to appear.
- Set the start and end dates for the ad.
- If scheduling multiple ads in the same slot, use Display Weighting to control how often each ad appears. A 1:1 ratio displays each ad equally.
- You can ignore the Advanced Scheduling Options as they are no longer relevant.
- Click Continue to finish scheduling.
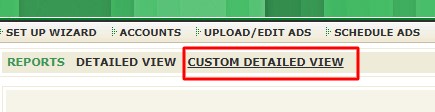
How to View Reporting in AdNext
- In the top menu, click Reports. The general report view provides an overview of your ad performance.
- The general report view will look like this:
- For a more detailed view, click Custom Detailed View. This allows you to look up a specific ad for any time period.


By following these steps, you can easily upload, schedule, and report on ads in AdNext using the SoCast Engage platform. If you have any questions or need further assistance, please contact our support team.
Related Articles
How Do I Get Started with the SoCast Revive Ad Server for Website Advertising?
How Do I Get Started with the SoCast Revive Ad Server for Website Advertising? Introduction If you’re used to managing promotions and advertising on air, the SoCast Revive Ad Server is your digital counterpart for website ads. It schedules and ...How Do I Use the SoCast Reach Dashboard, Proposal Builder, and Reporting?
Overview Yes! Here is a useful video for you. Our Digital Sales Enablement Specialist will introduce you to the essentials of the SoCast Reach Dashboard and Omnichannel Proposal Builder. Familiarize yourself with the digital process: the SoCast Reach ...Can Display Ads Be Animated in SoCast Engage or SoCast Reach?
Can Display Ads Be Animated in SoCast Engage or SoCast Reach? Yes. Display ads can be animated in both SoCast Engage and SoCast Reach. These are referred to as “Dynamic Ads” and are typically uploaded in GIF format. Please note the following: There ...How a Radio Broadcaster Ran a Successful Industrial Recruitment Campaign Using SoCast Engage and SoCast Reach? (Case Study)
How a Radio Broadcaster Ran a Successful Industrial Recruitment Campaign Using SoCast Engage and SoCast Reach? Overview This case study highlights how a radio broadcaster used SoCast’s digital solutions to run a successful industrial recruitment ...How Do I Upload Creative Assets in SoCast Reach?
How Do I Upload Creative Assets in SoCast Reach? Note: This process is typically completed by the salesperson. When creating your campaign in SoCast Reach, you will need to upload creative assets. Below are the recommended sizes and specifications ...