How Do I Manage DNS Changes to Launch My SoCast Website?
How Do I Manage DNS Changes to Launch My SoCast Website?
Updating your domain’s DNS configuration is a crucial final step in launching your SoCast website. DNS settings are typically managed through your domain registrar (the company where you purchased your domain), but they may also be hosted by a third party if you are taking over an existing domain. It’s essential to know who manages your DNS records, as you will need access to make these changes.
Note: While this guide covers the general process, DNS administration can vary by provider and region. If you are unsure how to proceed, please consult your domain registrar for assistance.
Important: SoCast does not provide DNS support unless you have purchased our DNS Concierge Services. If you need help making DNS changes, please contact your DNS panel administrator or your domain registrar directly.
1. Understanding DNS Records
The website record set includes a list of CNAME and A records needed to point your website domain to the SoCast platform. These records should be added last and only when you are ready to officially launch your SoCast website. Ensure the correct domain names are added to your Website Settings before configuring these records to avoid service interruptions.
2. Website Records
Before proceeding, make sure you have already set up any required email verification records. Updating your website DNS will redirect all traffic from your old website to your new SoCast-hosted site.
Launching the Site
Be careful during this step, as incorrect configuration can cause outages. From your provided CSV file (or the example below), note the following:
- Record Name (Column A): Usually called “Name” or “Host.” Most DNS providers automatically append your domain name, so you typically do not need to include it. For example, a record for
ourtestdomain.comshould use the value from Column C. - Record Type (Column B): Indicates the type of record (A or CNAME). A records point to an IP address; CNAME records point to another hostname.
- Record Value (Column C): The destination for the record, such as an IP address or hostname.
Preparing the Platform
Before creating DNS records, configure the SoCast platform to respond to your desired hostnames. For example, you might set up:
- ourtestdomain.com: The primary hostname for your site.
- www.ourtestdomain.com: A secondary (alias) address that forwards to the primary hostname.
- news.ourtestdomain.com: Another alias that also forwards to the primary hostname.
By default, SoCast provides DNS examples for the root domain (e.g., ourtestdomain.com) and the “www” prefix. You can add or remove hostnames as needed.
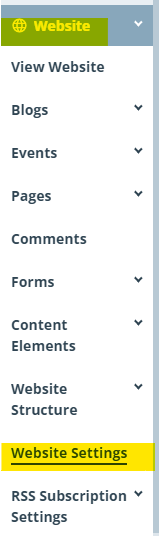
To configure these in the SoCast backend:
- Log in to the SoCast backend with an account that has permission to modify Website Settings.
- In the top-right navigation, click Settings.
- Select Website Settings.
- Under General > Vitals, set your Website Domain to the primary hostname (e.g.,
ourtestdomain.com).
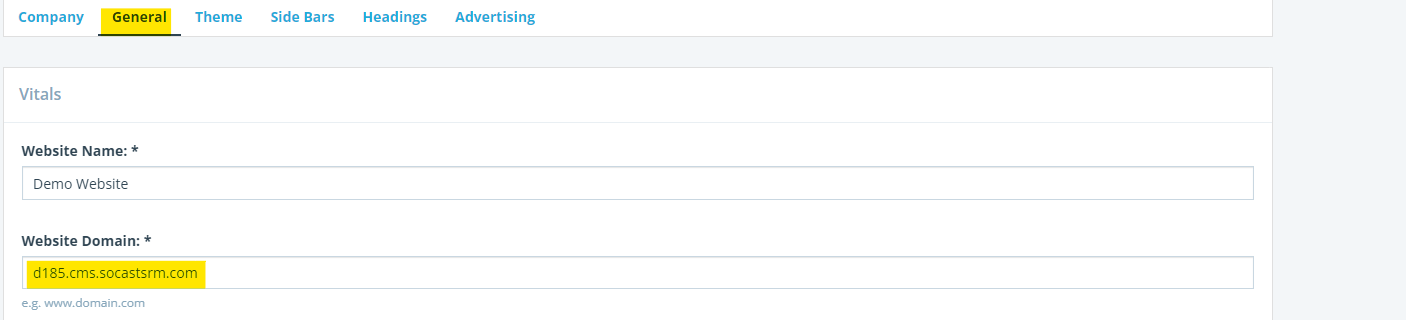
- Under Website Redirect, click Add Row to add secondary hostnames (e.g.,
www.ourtestdomain.com).

- Click Save.
Implementing Website Records
- Log in to your DNS provider’s configuration panel.
- Create an A record for your primary domain pointing to the SoCast platform using the value provided in your CSV. For example, for
ourtestdomain.com:
Use the “@” symbol in the “Host” or “Name” field to represent the domain name (e.g., ourtestdomain.com).
- Create CNAME records for secondary domains pointing to the primary domain. For example, set the “Host” as
wwwand “Points to” asourtestdomain.com.
Set the TTL (Time to Live) value for these records to less than 1 hour to ensure changes propagate quickly.
3. Securing Your Site
The SoCast platform provides several security features that are automatically enabled once your site is launched. These measures ensure a safe and secure browsing experience for your audience.
Web Application Firewall
SoCast secures your website with a web application firewall designed to protect against common internet threats, including:
- Denial of Service (DoS) attacks
- Cross-Site Scripting (XSS)
- Malicious bots
- Injection attacks
If you use a third-party security service (such as Cloudflare), we recommend disabling their proxy or firewall features for your SoCast site, as they can interfere with SoCast’s built-in protections and may cause availability issues.
SSL Certificates
All SoCast customers receive a free, ongoing SSL certificate to secure their websites. This certificate is automatically generated and updated to include any additional website aliases configured in your DNS settings. Once your site is launched and all DNS records are in place, the SSL certificate will be issued or updated within about an hour. If your site is not secured after 12 hours, please contact Client Services for assistance.
Note: Only hostnames that resolve to the SoCast platform via DNS will be included in your SSL certificate. Any hostnames not properly configured will be excluded.
Related Articles
What Is the Complete Website Launch Checklist for Your SoCast Website?
What Is the Complete Website Launch Checklist for Your SoCast Website? Who Is This For? Roles: SoCast Account Admins, Content Editors, Promotions Staff Applicable To: All Themes After your kick-off call with your SoCast Onboarding Specialist, you’re ...How Do I Set Up a New Domain or Redirect for My SoCast Website?
Ensure that all domains are pointed to the SoCast IP address: 54.84.131.112. Log in to SoCast Engage or AMP CMS. Go to the website settings section. Set the primary domain as the www version (e.g., www.example.com). Add any redirect domains, ...Does SoCast Engage Host Domains Or Provide DNS Services?
No, SoCast Engage does not host domains or provide DNS services. If you wish to use your domain with SoCast Engage, you will need to manage your domain and DNS settings through your own registrar. To ensure your website works correctly with SoCast ...How Do I Request a Station Rebrand With SoCast for My Website and Mobile App?
How Do I Request a Station Rebrand With SoCast for My Website and Mobile App? This Article Is For Existing clients who have launched websites and/or mobile apps with SoCast and wish to rebrand. Requests must be submitted in advance by a Company Admin ...How Do I Make a Hero Image Appear on All Pages in SoCast Engage?
Log in to SoCast Engage. Go to Website > Website Settings > Theme. Click Launch Theme Editor. A popup redirect will appear. In the Theme Editor, select Heroes. Choose the website hero you want to display across all pages. Customize the position and ...