How Do I Add a Single Image Element to My SoCast Page, Blog, Contest, or Sidebar?
How Do I Add a Single Image Element to My SoCast Page, Blog, Contest, or Sidebar?
Who Is This For?

- All users with access to pages, blogs, contests, or sidebars
- Applicable to all themes
Tips

- How to optimize the Single Image element for mobile responsiveness: For best results on mobile devices, select "Large" as the image size instead of "Thumbnail."
- The Single Image widget supports JPG, GIF, and PNG file formats.
Step-by-Step Guide
-
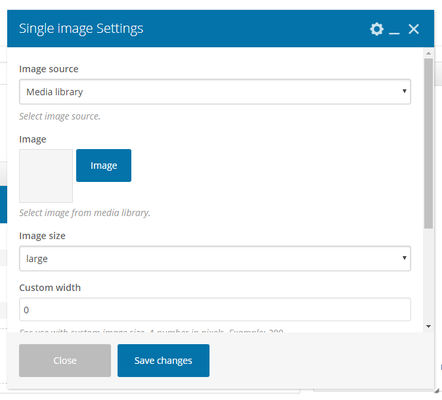
Image Source: Choose one of the following options:
- Media Library: Upload an image from your media library. If you select this option, follow steps 2–3 and 6–10.
- External Link: Paste the direct image URL in the External Link field. If you select this option, follow steps 4–10.
-
Image: Click the Image button to upload an image from one of the following sources:
- From Computer: Upload an image from your computer.
- Media Library: Choose an image already uploaded to the media library.
- Stock Image: Select a stock image. For more information on stock image rules and usage, see the Stock Image Library Overview.
-
Image Size: The default size is "Large." You can choose from:
- Thumbnail
- Medium
- Large
- Full
- Custom
- External Link: Add the image link/URL here if you are using an external image.
- Caption: If you want to add a caption to your image, enter it here. The caption will display underneath the image.
- Custom Width: For use with the Custom image size option. Enter a value in pixels (e.g., 200).
- Custom Height: For use with the Custom image size option. Enter a value in pixels (e.g., 200).
- Image Link: Enter a URL if you want the image to link to another page. Leave this blank if you do not want the image to be clickable.
- Link Target: Choose whether you want the image link to open in the current window or a new window.
- Click Save to apply your changes.
Example
Related Articles
How Do I Add a Header Text Element to a Page, Blog, Sidebar, or Contest in SoCast?
How Do I Add a Header Text Element to a Page, Blog, Sidebar, or Contest in SoCast? This Article Is For All users with "Manage All Pages" or "Manage Selected Pages" permissions All users with access to Pages, Blogs, Sidebars, or Contests Applicable to ...
How Do I Add a Feature Rotator Element to My Page, Blog, Sidebar, or Contest?
This Article Is For: All users who have: Manage All Pages or Manage Selected Pages Permissions All Users who have access to one of the following: Pages, Blogs, Sidebars or Contests This is applicable to: All themes Note: If all items in the feature ...
How Do I Add a Row Element in SoCast Engage?
How Do I Add a Row Element in SoCast Engage? Who Is This For? All users who have access to pages, blogs, contests, or sidebars. Applicable to all themes. Note A row can be inserted into a parent row or column. Step-by-Step Guide Click the blue Add ...
How Do I Link a Blog Post, Contest, Page, or Event to a Feature Rotator in SoCast Engage?
Log in to SoCast Engage. Navigate to Promotions > Feature Rotators > All Feature Rotators. Find the rotator you want to edit and click the pencil icon under the Actions column. To link a blog, contest, page, or event: Use the Import Feature Elements ...
How Do I Organize Blog Categories and Contest Posts on the Homepage in SoCast Engage?
You can control how blog categories, contest posts, and RSS feed content appear on your homepage by adjusting your homepage settings. To Add or Edit Blog Categories in the Homepage Feed: Go to Website > Pages > All Pages. Search for your Homepage (or ...

